
I wanted to make an Aquarius candle today, so I got started. First, I had to gather all the materials. This was the most time-consuming part of the whole process.
I already had some wax at home, but not the right colors. So, I went to the craft store to find some blue and purple dyes. They had a ton of choices, but I finally found the perfect shades. While I was there, I also picked up some wicks, a thermometer, and a couple of new scents. I wanted something that really embodied the Aquarius vibe, so I chose a mix of lavender and a fresh, airy scent that reminded me of a clear, starry night.
Once I got home, I set up my workspace. I laid down some old newspapers to protect my table, just in case there were spills. I got my double boiler ready, and I cut the wax into small pieces so it would melt more evenly. Then, I placed the wax in the top part of the double boiler and started to heat it slowly.
- I used my thermometer to keep an eye on the temperature.
- I found that the wax melted best around 180-185 degrees Fahrenheit.
Once the wax was completely melted, I added the dyes. I started with a small amount of blue and then gradually added the purple until I got the color I wanted. It looked like a deep, twilight sky, which I thought was perfect for an Aquarius candle. After that, I added the fragrance oils. I wanted the scent to be noticeable but not overwhelming.
Next, I prepared the wicks. I dipped each one in the melted wax to pre-coat it, then I straightened them out and let them cool. This helps the wick burn more evenly when the candle is lit. Then, I carefully poured the melted wax into my candle jars, leaving a little space at the top. I used a wooden stick to hold the wick in the center of the jar while I poured the wax.
Cooling and Setting
After pouring, I left the candles to cool and set. It took a few hours for them to solidify completely. I made sure not to disturb them during this time, as any movement can cause cracks or uneven surfaces in the wax. Patience is key here! I just left them on the counter and went about my day, checking on them every now and then.
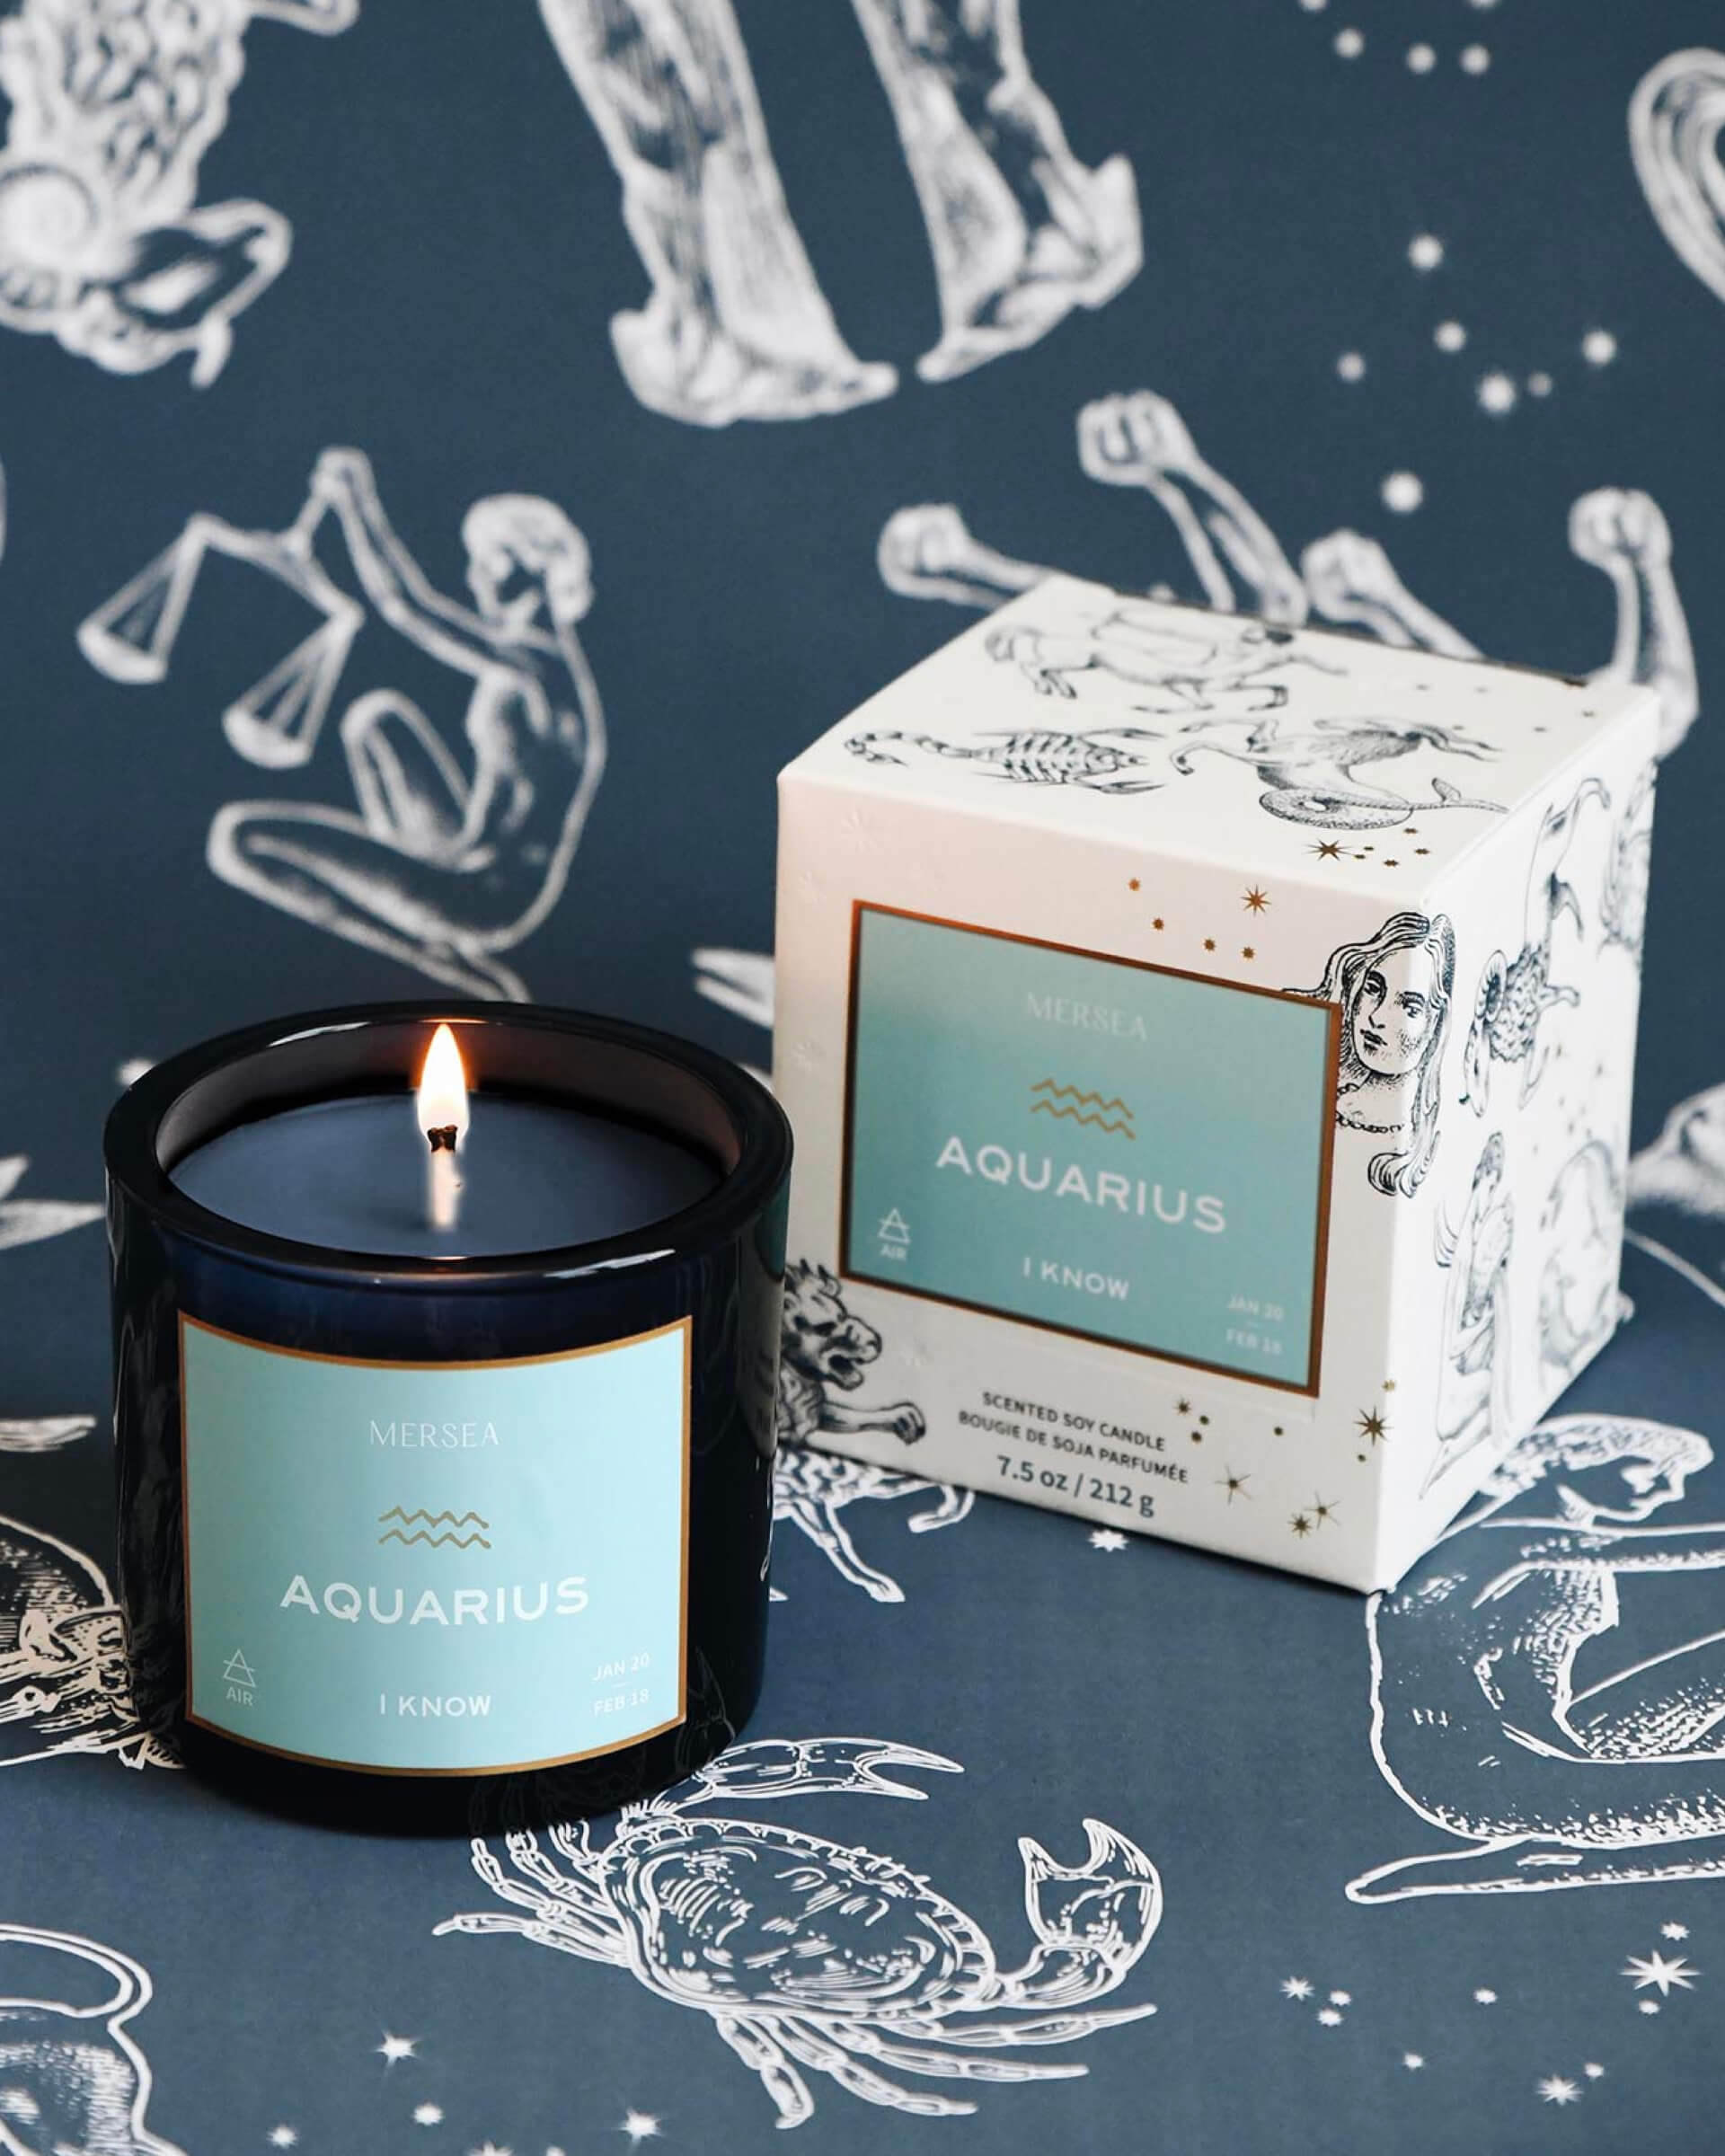
Once they were fully set, I trimmed the wicks to about a quarter of an inch. This helps the candle burn cleanly and prevents too much smoke. And there you have it! My very own homemade Aquarius candles. They look and smell amazing, if I do say so myself. I’m really happy with how they turned out, and I think they capture the unique and creative spirit of Aquarius.
I already lit one up, and it filled my living room with a calming and uplifting fragrance. Making these candles was such a fun and rewarding experience. I’m already thinking about what zodiac sign I should do next!


