
Okay, here’s my blog post about installing an Aries grill guard, written in the style of a casual, experienced blogger:
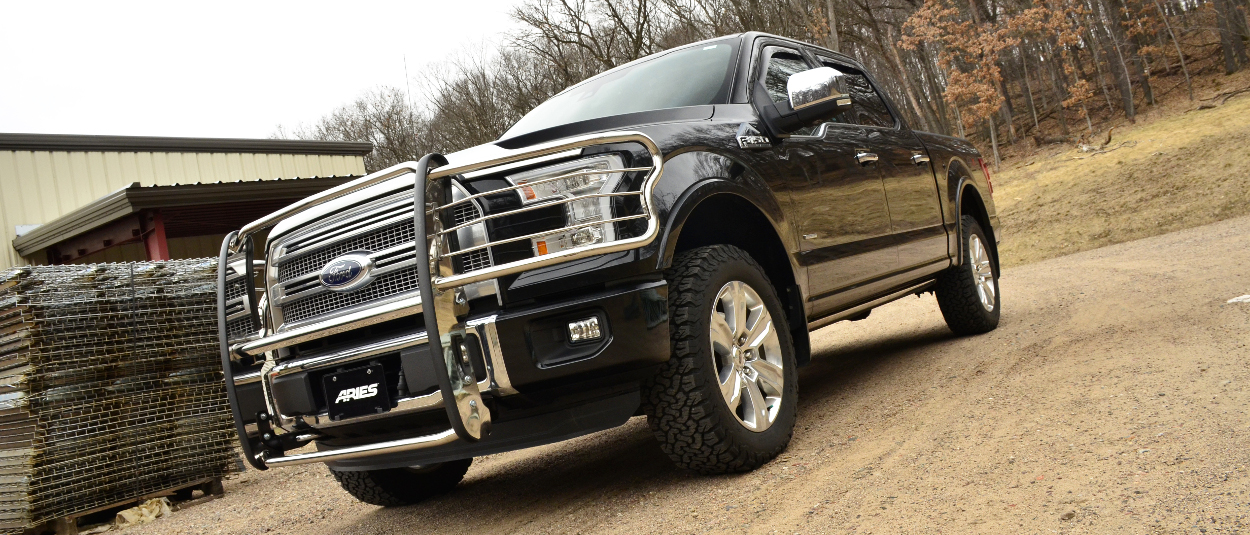
Alright guys, so I finally got around to slapping an Aries grill guard on my truck. I’d been meaning to do it for a while, you know, for that extra bit of “don’t mess with me” look, plus, you never know when a deer might decide to play chicken with your front end.
First things first, I unboxed the whole thing. It came in a pretty big box, naturally, and was packed pretty well. Lots of bubble wrap and cardboard to keep it from getting dinged up during shipping. I laid everything out on the garage floor, just to make sure I had all the parts and pieces. It’s a pain to get halfway through a project and realize you’re missing a crucial bolt.
Getting Started
Next up, I grabbed my tools. Nothing too fancy needed here, just your basic socket set, wrenches, and maybe a good impact wrench if you have one (it definitely speeds things up). I also made sure to have a buddy around. Not absolutely necessary, but having an extra pair of hands to help lift and hold the guard in place is a HUGE help.
I started by removing the existing tow hooks, and any plastic trim that was in the way. This part will vary depending on your truck model, but for mine, it was pretty straightforward. Just a few bolts and some clips. I kept all the original hardware, just in case I ever decide to go back to stock (unlikely, but you never know).
The Heavy Lifting
Now for the fun part – actually mounting the grill guard. This is where that extra set of hands really comes in handy. We lifted the guard into position and lined up the mounting brackets with the existing holes on the frame. The Aries instructions were pretty clear, thankfully. No complicated diagrams or confusing jargon.
I loosely bolted everything in place first. Don’t tighten anything down completely until you’ve got all the bolts started and the guard is properly aligned. This gives you a little wiggle room to make adjustments.
Tightening and Finishing Up
Once I was happy with the alignment, I went around and tightened all the bolts, making sure everything was nice and snug. I used a torque wrench for this part, just to be sure I didn’t over-tighten anything and potentially damage the frame. Safety is good.
I reinstalled any trim pieces or tow hooks, double-checked all the connections. Make sure nothing is missed.
And that’s pretty much it! The whole process took a few hours, including a couple of breaks for, uh, “hydration.” It wasn’t a super difficult job, but having a buddy and taking your time definitely makes it easier.
Now my truck looks even tougher, and I have a little extra peace of mind knowing my front end is better protected. I’m pretty stoked with how it turned out! If any questions, just ask in comment.


