
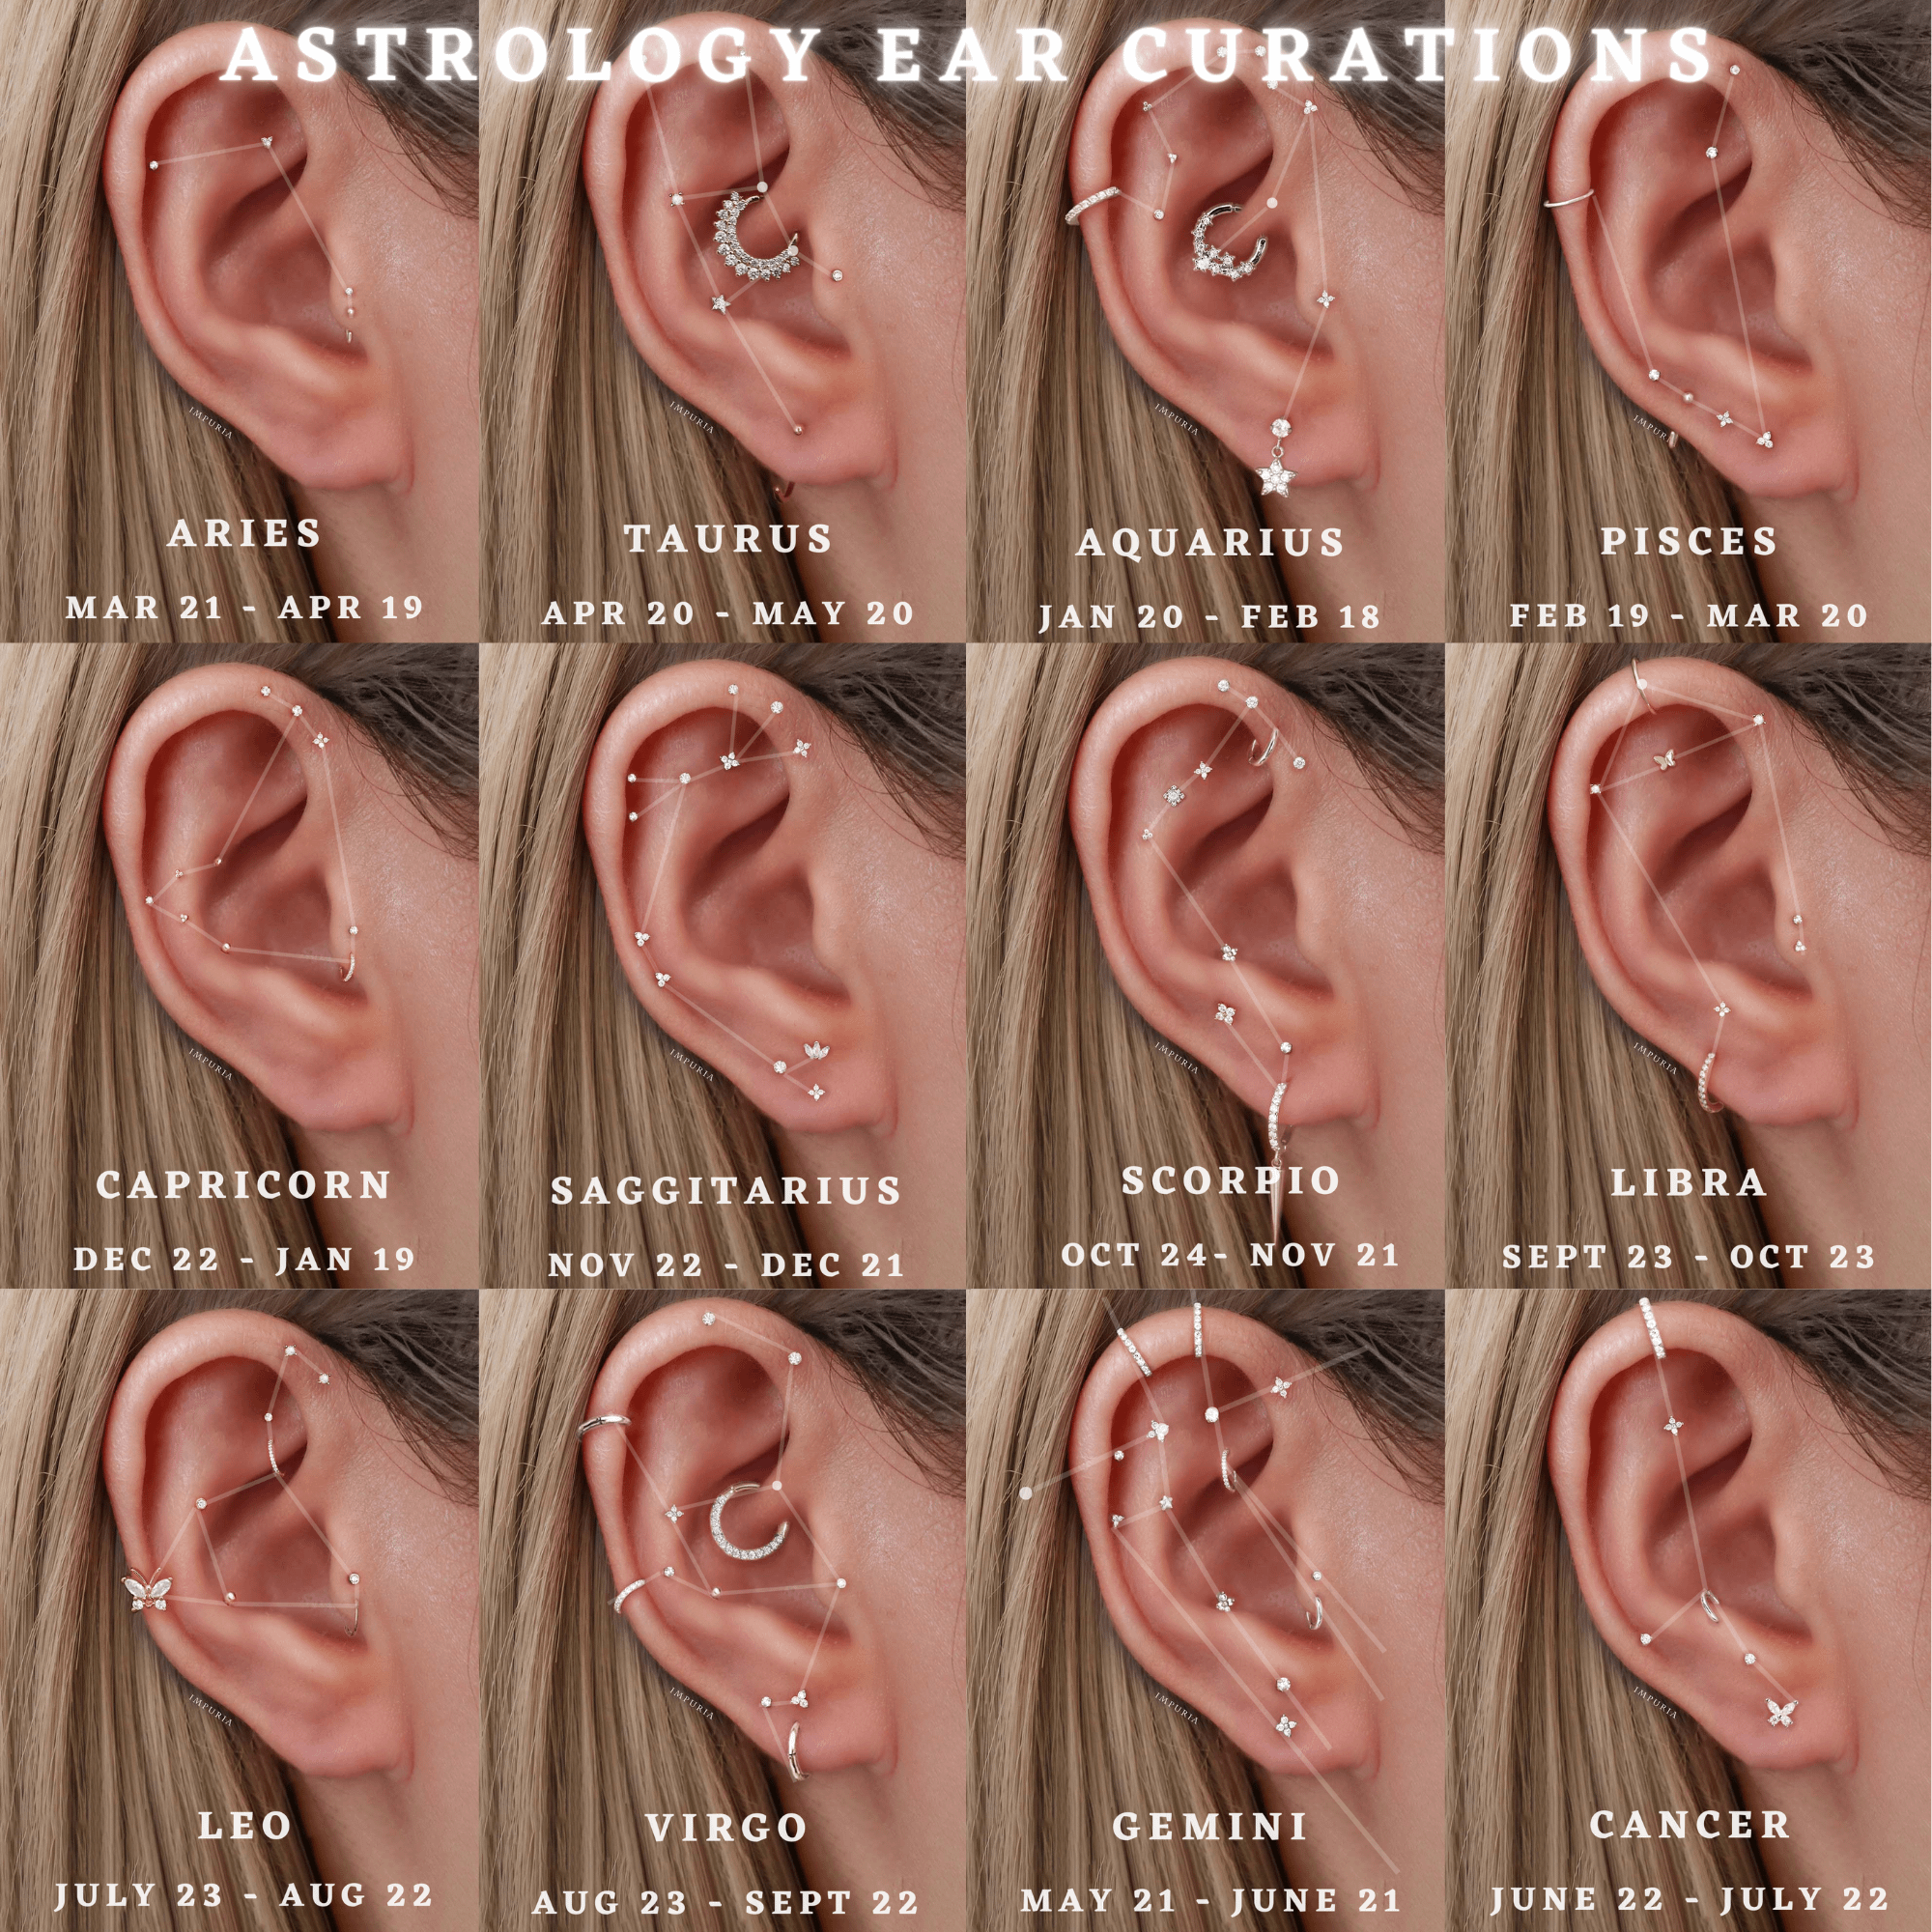
Okay, so I’ve been seeing these “constellation ear” piercings all over my feed, and I was like, “I gotta try that!” It looked so cool and personalized, you know? So, I started my little DIY project.
The Planning Phase
First, I spent a good chunk of time just staring at my ears in the mirror. Sounds weird, I know, but I wanted to figure out where the piercings would look best. I grabbed a pen – a washable one, thankfully! – and started marking little dots where I thought the “stars” of my constellation should go. I wanted it to be unique, representing my birth sign. I think it’s Libra.
- Looked at tons of pictures online for inspiration.
- Made sure I had all the right tools: the piercings themselves.
- Clean my ear with the alcohol.
Getting It Done
I think It is time to make a decision. I chose to book the professional piercer. Because I was not confident with myself.
During I was waiting for the piercer. I showed the piercer the dots I’d marked and the general idea I had in mind. They gave me some suggestions, tweaked a few things, and we finalized the design together. It felt super collaborative, which I loved.
Then came the actual piercing part. Honestly, it wasn’t as bad as I thought! Each little prick was quick, and the piercer was super gentle and reassuring. They talked me through the whole process, which helped calm my nerves. I focused on my breathing, just like they tell you to do in yoga, haha.
The Result!
And… done! I looked in the mirror, and I was immediately obsessed. It looked even better than I’d imagined! All those little studs formed my personalized constellation, sparkling away. It felt so me. It is a really cool design, right?
The piercer gave me all the aftercare instructions: how to clean it, what to avoid, and so on. I’ve been super diligent about following them because I definitely don’t want any infections. It’s been a week, and everything’s healing up nicely. It’s a fun process.


